Tuesday, December 18, 2012
Wednesday, November 21, 2012
Tutorial: Shabby Scrappy Christmas Stars!
Yay! Christmas for me, has come early, thanks to the special holiday 'Gift Wrap' print offer at Spoonflower!
I was sooo excited when my gift wrap order arrived, it was totally ridiculous!!!
.... now all I need to do, is decide if I can actually bring myself to use it!
In the meantime, here is a Tutorial for some 'Easy As' :
Shabby Scrappy Christmas Stars
~ Enjoy :)
 Gift Wrap (From Top: Vintage Christmas Stripes & Vintage Christmas) Tutorial: Shabby Scrappy Stars
 Gift Wrap (From Top: Vintage Christmas Stripes & Vintage Christmas) Tutorial: Shabby Scrappy Stars
You will need: fabric scraps, pen, cardstock, pins, cotton, needle, glass beads, stuffing, cord/ribbon.
SHABBY BEAD STAR:
~ Template : On cardstock draw a freehand star (12cm from point to point)
~ Pin template to a double layer of fabric
~ Cut out fabric stars
~ Pin fabric stars (wrong sides together)
~ Sew/bead together (5mm from edge) leaving a small gap in one side
~ Fill star with stuffing
~ Insert ends of looped cord, and continue sewing to close gap.
SCRAPPY STAR:
~ Using template above as a guide draw an addtional smaller star template (about 10cm across from point to point)
~ Pin 12cm template to a double layer of fabric and cut out fabric stars
~ Pin 10cm template to a double layer of (contrasting coloured) fabric and cut out fabric stars
~ Place 1 small star onto 1 large star (right sides up) and pin together
(creates 1 side of final star)
Sew fabrics together (very ROUGHLY 5mm from edge) and continue, till you have sewn right around the star twice
~ REPEAT the last step with the remaining large and small star!
~ Pin sewn stars (wrong sides) together
~ Sew together (5mm from edge) leaving a small gap in one side
~ Fill star with stuffing
~ Insert ends of looped cord, and continue sewing to close gap.
© Kristopher K 2012 - All rights reserved.
Monday, November 12, 2012
Mini Print Collection
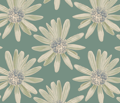
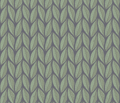
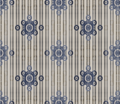
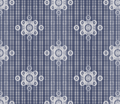
All new 'Mini Print Collection'
- Four mini prints for maxi fun!
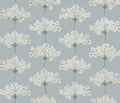
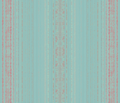
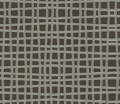
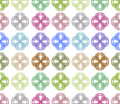
Today I decided to make some cute fabric gift tags with my new 'Mini Print' samples:(from left)
I love this time of year, as my crafting box finds its way to the centre of our dining table and I start to think about decorating the house for Christmas!
It's a good thing however, looking at my depleted fabric stash (while drooling over the new Christmas Fabrics at Spoonflower) ... that I'm just in time to take advantage of Spoonflower's upcoming Free Shipping Day on Thursday November 15th, 2012!
Oh! and if Free Shipping isn't cool enough (yes! even to Australia - whoohoo) The fabulous folk at Spoonflower are printing selected designs in the Spoonflower marketplace for a limited time on Gift Wrap!
I think Christmas has surely come early for me this year.
... Happy Crafting :)
Sunday, October 28, 2012
Fabulous!
It is always such a treat for me seeing
Kristopher K Fabrics in Action!
- thank you all so much for sending me your photos, links and updates : Below are a few fabulous creations, that I've just recently received - WOW!
...
...
Pillows: by Anson & Gonzalez

Design: Chelsea Road

Design: Fretwork Fire
...
Tote Bag by TwoBeardsPlusMomma
Design: Wild Welsh Stag 18" x 18"
Saturday, March 10, 2012
Wicket Press Fabric Collection
Below is a selection of designs from my new fabric collection: Wicket Press
Organic "hand stamped" lines repeat on linen textured backgrounds in fresh contemporary colour palettes
Wednesday, February 15, 2012
"Easy As" Recycled Mini Glass Vase
I love using old glass bottles to display flowers, fresh from the garden.
I find however, that mini glass bottles (recycled from supermarket juice bottles) used on their own can be wobbly at the best of times ... so in order to make these little glass bottles more stable, I decided to join several together, simply by wrapping them with twine!
To make these "Easy As" Mini Glass Vases:
1) Place (a minimum of two) mini glass bottles side by side
2) Wrap twine around the outside of all your mini glass bottles (If joining more than two bottles you will probably need another pair of hands to help you hold the bottles.)
3) Wrap twine tightly between each of the bottles (enough to stop the glass from touching)
4) Fill your new vase with water and flowers and enjoy :)
Wednesday, February 01, 2012
Happy New Year!
Sorry for the lateness of this post (I mean really ... can you believe it's the 1st of February already) ... but I am so excited to-day to be back in the studio, and I just wanted to shout out a great BIG ....
☆¸.•°*”˜˜”*°• Happy New Year •°*”˜˜”*°•.¸☆
and
Thank-you, to you all :)
Your wonderful support and continued encouragement has made 2011 a totally amazing year for me!
I am still over the moon, to have discovered I have once again made it onto the list of Top Indie Fabric Designers @Spoonflower (Making the grade for 2011 at number 14 - Wow :)
Wishing you all my very best for a Fabulous, Happy and Healthy, 2012!
I am still over the moon, to have discovered I have once again made it onto the list of Top Indie Fabric Designers @Spoonflower (Making the grade for 2011 at number 14 - Wow :)
Wishing you all my very best for a Fabulous, Happy and Healthy, 2012!
❤ Kris
Image above (via Spoonflower's new create fabric web page) includes our designs: Lucky Four (pictured top) and Paper Daisy - Provence Blue (pictured lowest) ~ So cool to be featured ... thank-you Spoonflower :)
Friday, December 23, 2011
Merry Christmas :)

Wishing you and your loved ones, a very
Merry Christmas
Merry Christmas
and a fabulous fun and festive holiday season!
Thank-you all so much for your wonderful support and encouragement throughout 2011 :)
See you all in 2012!
Cheers, Love Kris
xxx
(Designs above from my new collection: Faded French :)
Monday, December 12, 2011
"Easy As" Fabric Roses
Do you like crafting at Christmas Time?
Christmas is usually my favourite time of year to sit around the dining table, chatting and crafting with friends and family.
I've always loved easy - yet - Oh! so pretty crafts that add a vintage or handmade feel to your decorating - I think pretty fabric roses fit this brief perfectly and best of all they can be made at any time of year!
Easy As - Fabric Rose - Tutorial!
- Tear a strip of fabric / old scraps of cotton and/or linen fabrics are perfect for these pretty roses
(Note: changing the width and length of your fabric strips will create interesting variations in your roses
- Fray the edges of your fabric strip
- Tie a knot in one end of your fabric strip
- Wrap the remaining fabric strip around the knot (twisting as you go)
- As you twist the fabric use a needle and thread to stitch (hold) fabric in place (or hold fabric in place with glue from a hot glue gun etc)
- When you have almost finished wrapping your rose, tuck the end of your fabric strip to the underside of your new rose
- Your new fabric rose can then be sewn onto ribbon to decorate presents etc
-Enjoy :)
Thursday, December 01, 2011
Fabric Gift Tag Tutorial

It's the 1st December! - can you believe it?
For us the 1st December has always been the day when our old dusty box of Christmas Crafty Goodness gets pulled down from the back of the cupboard, and our home is decorated for Christmas (although I'm always so tempted to start earlier)
So today as well as decorating the tree, I've made some personalised Gift Tags (with a lovely handmade shabby feel) for the numerous "brown paper packages" soon to be placed under the tree!
Below is a little DIY tutorial, for my Fabric Gift Tags ... Happy Decorating :)
Fabric Gift Tag Tutorial
Materials
1 x 3.5" x .5" cardstock rectangle (per gift card)
1 x 7" x 1" linen or burlap fabric rectangle (per gift tag)
Sewing Machine and thread (to match fabric)
Scissors
Hole punch and eyelet kit (or a button and thread)
Stamps, Stencil Kit or Fabric Paint to decorate
Method
- Cut cardstock rectangle to size
- Cut fabric rectangle to size and fray edges
- Wrap cardstock rectangle with the fabric rectangle to create fabric gift card
- Sew around all edges of gift tag (to the inside of the frayed edge)
- Using a hole punch make a hole in your gift tag about .5" in from one end of your gift tag (Or attach a button at one end of your tag)
- Trim any extra fabric /cardstock created by hole punch, to ensure a flat surface for eyelet
- Using hardware supplied with your hole punching kit attach eyelet
- Stamp, stencil, or paint your gift tag with a message or your recipients name etc
- Attach ribbon or twine (through the eyelet or around the button) and attach gift tag to your gift
- Voila :)
Saturday, November 05, 2011
"No Sew" Christmas Ornament Tutorial
... seeing all the Christmas Decorations starting to appear in the stores earlier this week, I decided today to make some new fabric ornaments for the tree! ...
(I know ... I know ... where has the year gone?)
So using fabric swatches of my design "Linen Look Stars" in Cinnamon and Mint (as above) I made these - So Simple! - So easy! - No Sew Ornaments :)
Below is a little Tutorial, incase your wanting to make some too :)
"No Sew" Christmas Ornament Tutorial
Materials:
1 x 65mm Polystyrene Ball (per ornament)
1 x 8" square of fabric (per ornament)
Pins
Twine
Instructions:
- Tear 8 even strips of fabric
- Place 2 strips of fabric together at right angles
- Continue to add strips of fabric (as shown)
- Place Polystyrene Ball in the center of the fabric strips
- Wrap the fabric strips around the polystyrene ball
- Fasten fabric in place, with a pin (and add a loop of twine under pin if hanging ornament)
- Enjoy :)
Wednesday, November 02, 2011
French Linen Fabric Collection
How was everyones Halloween?
.... lots of scary fun, lollies and candies I hope!
I was very excited to get some yummy candy myself this Halloween, when my latest Spoonflower order arrived, full of freshly printed crisp cotton fabrics :)
The following designs are all from my new collection "French Linen - Antique White" ~ I do hope you like them :)
Finally, speaking of all things French did you see the Melbourne Cup yesterday? (otherwise known as the race that stops a Nation)
What a race by the French horse Dunaden!
What a result - Dunaden by a nose hair
~ Hope you backed the winner :)
Wednesday, October 26, 2011
NEW: 'Faded French' - Fabric Collection
Hello Friends,
Thank-you all so much for your thoughtful comments on my recent Spoonflower Blog Post - I really enjoyed reading your comments (and it was very reassuring to know my photography tips made some sense - lol :)
To-day I thought I'd share a sneak peek of my newly designed Fabric Collection: 'Faded French' : featuring simple 'mix and match' palettes in Blue, Green and Brown :)
I'm also expecting a fabric delivery from Spoonflower (any day now - fingers crossed) so I hope to post some fresh fabric photos, featuring my latest 'Linen Look' designs very soon - Yay :)
Saturday, October 15, 2011
WIN - Free 'Kristopher K' Fabric
Would you like to win 1 free yard of 'Kristopher K' fabic?
Several days ago I was asked if I'd like to contribute some tips and techniques for photographing fabrics on the Spoonflower Blog. I was so excited to be asked, and now I'm even more thrilled to tell you, that the lovely folks over at Spoonflower are offering a prize of one free yard of 'Kristopher K' fabric, to one lucky reader simply for leaving a comment under the blog post (here) - Yay!
Also contributing some fabulous tips is Berene Campbell of Happy Sew Lucky?
- See Berene's photo tips, and possibly win the cutest Retrotastic Camera Bag Pattern by leaving a comment (here)
The winner for both prizes will be announced on the Spoonflower Blog on Monday 17th October at noon EST!
~ Good Luck
Magnolia Little Gem - Sage by Kristopher K
Several days ago I was asked if I'd like to contribute some tips and techniques for photographing fabrics on the Spoonflower Blog. I was so excited to be asked, and now I'm even more thrilled to tell you, that the lovely folks over at Spoonflower are offering a prize of one free yard of 'Kristopher K' fabric, to one lucky reader simply for leaving a comment under the blog post (here) - Yay!
Also contributing some fabulous tips is Berene Campbell of Happy Sew Lucky?
- See Berene's photo tips, and possibly win the cutest Retrotastic Camera Bag Pattern by leaving a comment (here)
The winner for both prizes will be announced on the Spoonflower Blog on Monday 17th October at noon EST!
~ Good Luck
Friday, September 02, 2011
Daisy Dress in Dusty Pink!
As soon as my "Dusty Pink Daisy" fabric sample (above) arrived from Spoonflower, I knew my days - To Do - List would be out the window!
So instead of working, I searched the internet for a cute little toddler dress pattern and spent the day sewing instead ;)
This so cute (and so easy to sew) 'A' line sundress is based on a free downloadable pdf pattern by Oliver + S called "popover sundress" ~ Thank-you ;)
Now that it's finished, I guess it's time to get back to work!
... Although It could be 'milk and cookies' time first ;)
Wednesday, July 27, 2011
Winging It!
Yay!
So happy to see a sneak peek today of the (Aug 2011) edition of Australian Homespun Magazine, as their Window Shopping Page 'Winging It' features our colourful little dragonfly design: Dragonfly Dance
Courtesy of Homespun Magazine, I am so excited to share this 'sneak peek' of 'Winging It' with you too!
- Happy Days ;)
Friday, June 17, 2011
Free Shipping 'Monday' at Spoonflower!
Heellloooo,
How is everyone?
It's been absolutely far too long since I said hello!
(Is it the cold - aka freezing - Winter weather sending me into hibernation?) Well, whatever it's been, the following news is just to good not to share:
Spoonflower is having a FREE SHIPPING Monday - Yay!
... Here are the details fresh from the Spoonflower Blog :)
"For 24 hours
-- from 8am ET on Monday, June 20th, to 8am ET the following day --
we're going to make shipping completely free on all Spoonflower orders. Free to those of you in the US and free to those of you elsewhere (shout out, Australia!). The offer will apply to standard shipping only, but otherwise there are no restrictions and no minimum or maximum order size to qualify. See you on Monday!"
... (Penciling in the diary now ;)
In other news ... Following the amazing response to our very first cushion 'Olives on Spice' (Now Sold Out) I've been busy designing and hand screen printing some all new 'French Provincial' inspired designs, that I hope will be available as cushions, in the Kristopher K Shop, very soon!
And finally 'Just for Fun'
... here is a photo of a new 'Kristopher K for Spoonflower' fabric - Bubbles - Designed originally for one of my young nieces, and featuring a palette of pink, plum, aqua and mint :)
How is everyone?
It's been absolutely far too long since I said hello!
(Is it the cold - aka freezing - Winter weather sending me into hibernation?) Well, whatever it's been, the following news is just to good not to share:
Spoonflower is having a FREE SHIPPING Monday - Yay!
"For 24 hours
-- from 8am ET on Monday, June 20th, to 8am ET the following day --
we're going to make shipping completely free on all Spoonflower orders. Free to those of you in the US and free to those of you elsewhere (shout out, Australia!). The offer will apply to standard shipping only, but otherwise there are no restrictions and no minimum or maximum order size to qualify. See you on Monday!"
... (Penciling in the diary now ;)
In other news ... Following the amazing response to our very first cushion 'Olives on Spice' (Now Sold Out) I've been busy designing and hand screen printing some all new 'French Provincial' inspired designs, that I hope will be available as cushions, in the Kristopher K Shop, very soon!
And finally 'Just for Fun'
... here is a photo of a new 'Kristopher K for Spoonflower' fabric - Bubbles - Designed originally for one of my young nieces, and featuring a palette of pink, plum, aqua and mint :)
Monday, April 25, 2011
Anzac Day
Today in Australia it is Anzac Day; a national day of remembrance to honour the Anzacs, (Australian and New Zealand Army Corps from WW1) and to remember all those who have died in military service for their country.
- Lest we Forget
During WW1 mothers and wives, who were anxious to send their loved ones in the trenches in Gallipoli, long lasting nutritional food supplements, started to bake what came to be called Anzac Biscuits
below is an old family favourite recipe ...
Anzac Biscuits
1 Cup each;
Plain Flour, Sugar, Rolled Oats, Coconut
100g butter
1/4 Cup Maple Syrup (or Golden Syrup)
1 tsp bicarbonate soda
2 tbls boiling water
1) Preheat oven to 170°C (about 325°F)
2) Line biscuit tray(s) with baking paper
3) Mix dry ingredients in a large bowl (Flour, Sugar, Oats and Coconut)
4) Melt butter and Syrup (approximately 30 sec in a microwave / or stir in a pan over a low heat)
5) Dissolve bicarbonate soda in boiling water, and add to butter mixture
6) Mix butter mixture well into bowl of dry ingredients

7) Place walnut sized tablespoons of mixture onto trays - leaving plenty of room for biscuits to spread.

8) Bake for 15 - 20 minutes, or until golden.
9) Cool biscuits on a wire rack.

ENJOY :)
- Lest we Forget
During WW1 mothers and wives, who were anxious to send their loved ones in the trenches in Gallipoli, long lasting nutritional food supplements, started to bake what came to be called Anzac Biscuits
below is an old family favourite recipe ...
Anzac Biscuits
1 Cup each;
Plain Flour, Sugar, Rolled Oats, Coconut
100g butter
1/4 Cup Maple Syrup (or Golden Syrup)
1 tsp bicarbonate soda
2 tbls boiling water
1) Preheat oven to 170°C (about 325°F)
2) Line biscuit tray(s) with baking paper
3) Mix dry ingredients in a large bowl (Flour, Sugar, Oats and Coconut)
4) Melt butter and Syrup (approximately 30 sec in a microwave / or stir in a pan over a low heat)
5) Dissolve bicarbonate soda in boiling water, and add to butter mixture
6) Mix butter mixture well into bowl of dry ingredients

7) Place walnut sized tablespoons of mixture onto trays - leaving plenty of room for biscuits to spread.

8) Bake for 15 - 20 minutes, or until golden.
9) Cool biscuits on a wire rack.

ENJOY :)
Subscribe to:
Posts (Atom)


