Showing posts with label Easy As Sewing. Show all posts

Monday, December 12, 2011

"Easy As" Fabric Roses


Do you like crafting at Christmas Time? 
Christmas is usually my favourite time of year to sit around the dining table, chatting and crafting with friends and family.
I've always loved easy - yet - Oh! so pretty crafts that add a vintage or handmade feel to your decorating - I think pretty fabric roses fit this brief perfectly and best of all they can be made at any time of year!

Easy As - Fabric Rose - Tutorial!
- Tear a strip of fabric / old scraps of cotton and/or linen fabrics are perfect for these pretty roses
(Note: changing the width and length of your fabric strips will create interesting variations in your roses
- Fray the edges of your fabric strip
- Tie a knot in one end of your fabric strip
- Wrap the remaining fabric strip around the knot (twisting as you go) 
- As you twist the fabric use a needle and thread to stitch (hold) fabric in place (or hold fabric in place with glue from a hot glue gun etc)
- When you have almost finished wrapping your rose, tuck the end of your fabric strip to the underside of your new rose
- Your new fabric rose can then be sewn onto ribbon to decorate presents etc

-Enjoy :)

Thursday, December 01, 2011

Fabric Gift Tag Tutorial


It's the 1st December! - can you believe it?


For us the 1st December has always been the day when our old dusty box of Christmas Crafty Goodness gets pulled down from the back of the cupboard, and our home is decorated for Christmas (although I'm always so tempted to start earlier)

So today as well as decorating the tree, I've made some personalised Gift Tags (with a lovely handmade shabby feel) for the numerous "brown paper packages" soon to be placed under the tree!

Below is a little DIY tutorial, for my Fabric Gift Tags  ... Happy Decorating :)

Fabric Gift Tag Tutorial

Materials

1 x 3.5" x .5" cardstock rectangle (per gift card)
1 x 7" x 1" linen or burlap fabric rectangle (per gift tag)
Sewing Machine and thread (to match fabric)
Scissors
Hole punch and eyelet kit (or a button and thread)
Stamps, Stencil Kit or Fabric Paint to decorate


Method

- Cut cardstock rectangle to size
- Cut fabric rectangle to size and fray edges
- Wrap cardstock rectangle with the fabric rectangle to create fabric gift card
- Sew around all edges of gift tag (to the inside of the frayed edge)
- Using a hole punch make a hole in your gift tag about .5" in from one end of your gift tag (Or attach a button at one end of your tag)
- Trim any extra fabric /cardstock created by hole punch, to ensure a flat surface for eyelet
- Using hardware supplied with your hole punching kit attach eyelet
- Stamp, stencil, or paint your gift tag with a message or your recipients name etc
- Attach ribbon or twine (through the eyelet or around the button) and attach gift tag to your gift
- Voila :)

Saturday, November 05, 2011

"No Sew" Christmas Ornament Tutorial

... seeing all the Christmas Decorations starting to appear in the stores earlier this week, I decided today to make some new fabric ornaments for the tree! ...
(I know ... I know ... where has the year gone?)


So using fabric swatches of my design "Linen Look Stars" in Cinnamon and Mint (as above) I made these - So Simple! - So easy! - No Sew Ornaments :)
Below is a little Tutorial, incase your wanting to make some too :)

"No Sew" Christmas Ornament Tutorial

Materials:
1 x 65mm Polystyrene Ball (per ornament)
1 x 8" square of fabric (per ornament)
Pins
Twine

Instructions:
- Tear 8 even strips of fabric
- Place 2 strips of fabric together at right angles
- Continue to add strips of fabric (as shown)
- Place Polystyrene Ball in the center of the fabric strips
- Wrap the fabric strips around the polystyrene ball
- Fasten fabric in place, with a pin (and add a loop of twine under pin if hanging ornament)
- Enjoy :)

Friday, September 02, 2011

Daisy Dress in Dusty Pink!

As soon as my "Dusty Pink Daisy" fabric sample (above) arrived from Spoonflower, I knew my days - To Do - List would be out the window!
So instead of working, I searched the internet for a cute little toddler dress pattern and spent the day sewing instead ;)
This so cute (and so easy to sew) 'A' line sundress is based on a free downloadable pdf pattern by Oliver + S  called "popover sundress" ~ Thank-you ;)

Now that it's finished, I guess it's time to get back to work! 

... Although It could be 'milk and cookies' time first ;)


Sunday, February 06, 2011

"Easy As" paper flowers :)

Happy Sunday ...

Today I've been making some fun paper flowers, that are not only an ideal way to dress up and decorate gifts but are oh so wonderfully - "Easy As" - to make.

I like to make them from recycled white tissue paper, (after carefully removing the wrap so often used by department stores on new purchases) - but vibrant colours work well for kids birthday parties, and restricted or limited mixed colour palettes help give a co-ordinated look to presents under a Christmas tree etc ....

.... If you'd like to try these out for yourself, see a wonderful tutorial for similar tissue paper flowers 
on the Feeling Fuzzy Blog <here>

But be warned ... try stopping after you've made just one :)


Tuesday, January 11, 2011

Bunting - Just for fun :)

Happy New Year !!!
I hope everyone has had a wonderful Christmas and New Year.


Over the last few weeks, we have also celebrated 
several family birthdays - including mine on New Years Eve - YAY! - Happy Birthday to all the other Capricorns :)

... and in what for us was some very surprising and exciting news, we made Spoonflowers list of Top 10 Indie Fabric Designers for 2010

All I can say is WOW ... and a HUGE, Thank-you, Thank-you, Thank-you, to everyone for all their amazing encouragement and support :)


I'm thinking all the celebrating may have stopped me noticing until now, that we are already 11 days into 2011 - Time seems to be flying by this year.
So finding some extra time today, just to relax and sew up my first ever Bunting Flags was fabulous. (I did cheat a little with the sewing - just cutting the edges of the flags with Pinking Shears - but I'm loving the way they have turned out ;)


Directions for "Easy As" Bunting:

Cut 15 fabric flags (as included in this bunting kit) with pinking scissors - Iron flat - Arrange as desired leaving an even space between each flag - Cut enough bias tape to fit all 15 flags side by side + extra on each side for tying bunting to hooks etc - Pin flags into place in bias tape (or folded ribbon) and sew to secure - Enjoy :)

Thursday, December 23, 2010

Merry Christmas :)


I had such fun today listening to old Christmas records, and making this cute fabric ornament with my new design "Vintage Christmas Star
..... Many many thanks to the Knitty Gritty Thoughts blog for your inspiring free tutorial on how to make these super cute ornaments :)
To all my fabulous friends here on Blogger, 

Wishing you a very
MERRY CHRISTMAS
and a
HAPPY NEW YEAR!!!

Thank-you so much for all your wonderful support throughout 2010

... you guys rock!!!

All the very best for 2011
Enjoy the holidays

Cheers,

Kris
xxx

Tuesday, November 02, 2010

Terrific Tuesday

Today has been a Terrific Tuesday ... why ? Well apart from being the first Tuesday in November and a day when a little old horse race called The Melbourne Cup stops a nation ... I also made some fun "easy as" fabric buttons :)

Using a simple button kit that I purchased from The Haby Goddess (here) it really was as "easy as" 1, 2, 3 to make these adorable fabric covered buttons (with absolutely no sewing skills required ;)

Fabrics shown are from my Perfect Pink Collection and include : (from top)
Disco Dots - Hot Pink
Country Checks
and
Spring Blossoms 


I hope you had a Terrific Tuesday too, and if you placed a bet on The Melbourne Cup, I hope you backed a winner!

Tuesday, May 18, 2010

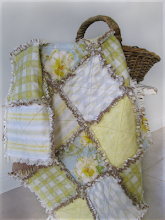
Shabby Raggy Soft and Snugly: Rag Quilt


Yay! 

Anyone who has ever made a Rag Quilt will probably understand, that I'm not exaggerating when I say 
.... there is cotton from one end of my studio to the other ... lol

But WHAT FUN it was, making my very first Shabby, Raggy, Soft and Snugly Rag Quilt, from a mix of (Organic Cotton Sateen and Quilting Weight Cotton) fabrics featuring designs from my "Shabby Rose" Collection.


From Fabric to Quilt Above.

Many thanks to the:

'green apple orchard' blog 
- For, inspiring me with their fabulous rag quilt Tutorial
"Easiest Quilt Ever! The Rag Quilt Tutorial"

And for more awe-inspiring Rag Quilt photos see:

La Dolce Boutique Blog: here

Ah *Sigh* 

Now I better get busy and tidy up the studio :)

Cheers, Kris


© Kristopher K 2010


Tuesday, May 04, 2010

First Square ... sneak peek!

... here is a 'sneak peek' of the first square of my new rag quilt 
(I just couldn't resist photographing the first square ;)

There is a fabulous rag quilt Tutorial on the:
'green apple orchard' blog titled:
"Easiest Quilt Ever! The Rag Quilt Tutorial"


(With a Tutorial Title like that, how could I not give a rag quit a try ;)
Hope you are all having a wonderful week, more photos soon.
Cheers Kris


© All rights reserved.

Tuesday, April 27, 2010

'Easy As' Headboard Slipcover

I have been procrastinating, for days now, trying to decide how to sew my new quilt / So this weekend, with a little help from my Facebook Friends (You know who you are ;) I decided to just start sewing.

... as I wanted to update the look of our guest bedroom, I decided to start with a simple "easy as" headboard slip cover.

This fabric slip-cover, is fabulously easy to make, and can transform the look of an existing headboard (be it modern, antique, painted or stained, timber or chipboard ;) in a matter of hours.


Featuring 'Kristopher K' Fabric Designs from Top:
Marie's Garden

Lucky Four
Rustic Floral
Rustic Stripes
and
Marie's Garden - Square


... And at least now I know where the quilt will live once it is made ;)


'Easy As' Headboard Fabric Slipcover:
Make your own pattern:


- To measure the required length of your headboard: simply measure from the top of the headboard / to the middle of the top mattress / times this length by two / and add your seam allowance.

- Then measure the width of your headboard: (This single headboard was 12.5 " wide) and add your side seam allowance to each side (if making from one piece of fabric) you have the required pattern size.

- Or you can feature strips of fabric: As shown: 2 strips of plain linen either side of a strip of patchwork fabric (made from sewing small strips of fabric together) Or design your own featuring as many strips as you want: just remember to allow for the extra seam allowances when working out your required widths.

- Sew all strips together (if using more than one piece of fabric ;)

- Hem around all sides.

- Fold slip cover in half (along the width line) front side up.

- Cut 12 ribbon ties and pin into place as shown:

- 3 on left (inside front) and 3 on right (inside front) then directly behind

- 3 on left (inside back) and 3 on right (inside back) and sew into place.

- Iron (you know you want to ;)

- Slip over existing headboard.

- Tie ribbons and Voila

.... it could then be time to pop the kettle on!

© All rights reserved.

Friday, April 16, 2010

Shabby Rose Collection

I feel like a child at Christmas time :)
Yesterday along with the new fabric proofs, my quilt fabric arrived (YAY!!! I can hardly wait to start quilting) 
And the new Cotton Lawn fabric, from Spoonflower, in my opinion, couldn't be more lovely: The only way I can describe it is, soft, breezy, and as light as air :)
Then later in the day, when I'd finished arranging and photographing yesterdays proofs, more arrived ... 
Here are some of them:


(From Left)
Shabby Rose
Shabby Stripe Grande
Shabby Diamond Grande
and
Shabby Check Grande


Finally, just to round out a totally fun, fabric filled day, I made another little dress.
(using the same New Look Pattern #6195 - that I now know I can sew - lol ;) with my fabric design:

White Wild Rose

© All rights reserved.

Thursday, April 15, 2010

Floral Chintz Dress

Let me start this post by saying:
At the end of a full days sewing, I was very glad I decided to sew my niece an EASY sew 1 hour dress - lol - 

But now that it's finished, I'm so happy with the final result (as is my niece :) that I can't wait to make her another one :)


I started with a New Look Pattern #6195 

- making dress B
And I followed the pattern exactly - with the exception of a little bit of ribbon to decorate the front panel, (as shown) - which I added before sewing the side seams.


Here is the finished dress (in Linen-Cotton Canvas) featuring my original fabric design: Floral Chintz


...................................................................

Also today, the proofs for several of my new fabric designs arrived - including a sample of the lovely new Spoonflower fabric option: cotton lawn
... I can't wait till tomorrow, so I can photograph the fabrics and post the photos ... stay tuned :)

© All rights reserved.

Saturday, April 03, 2010

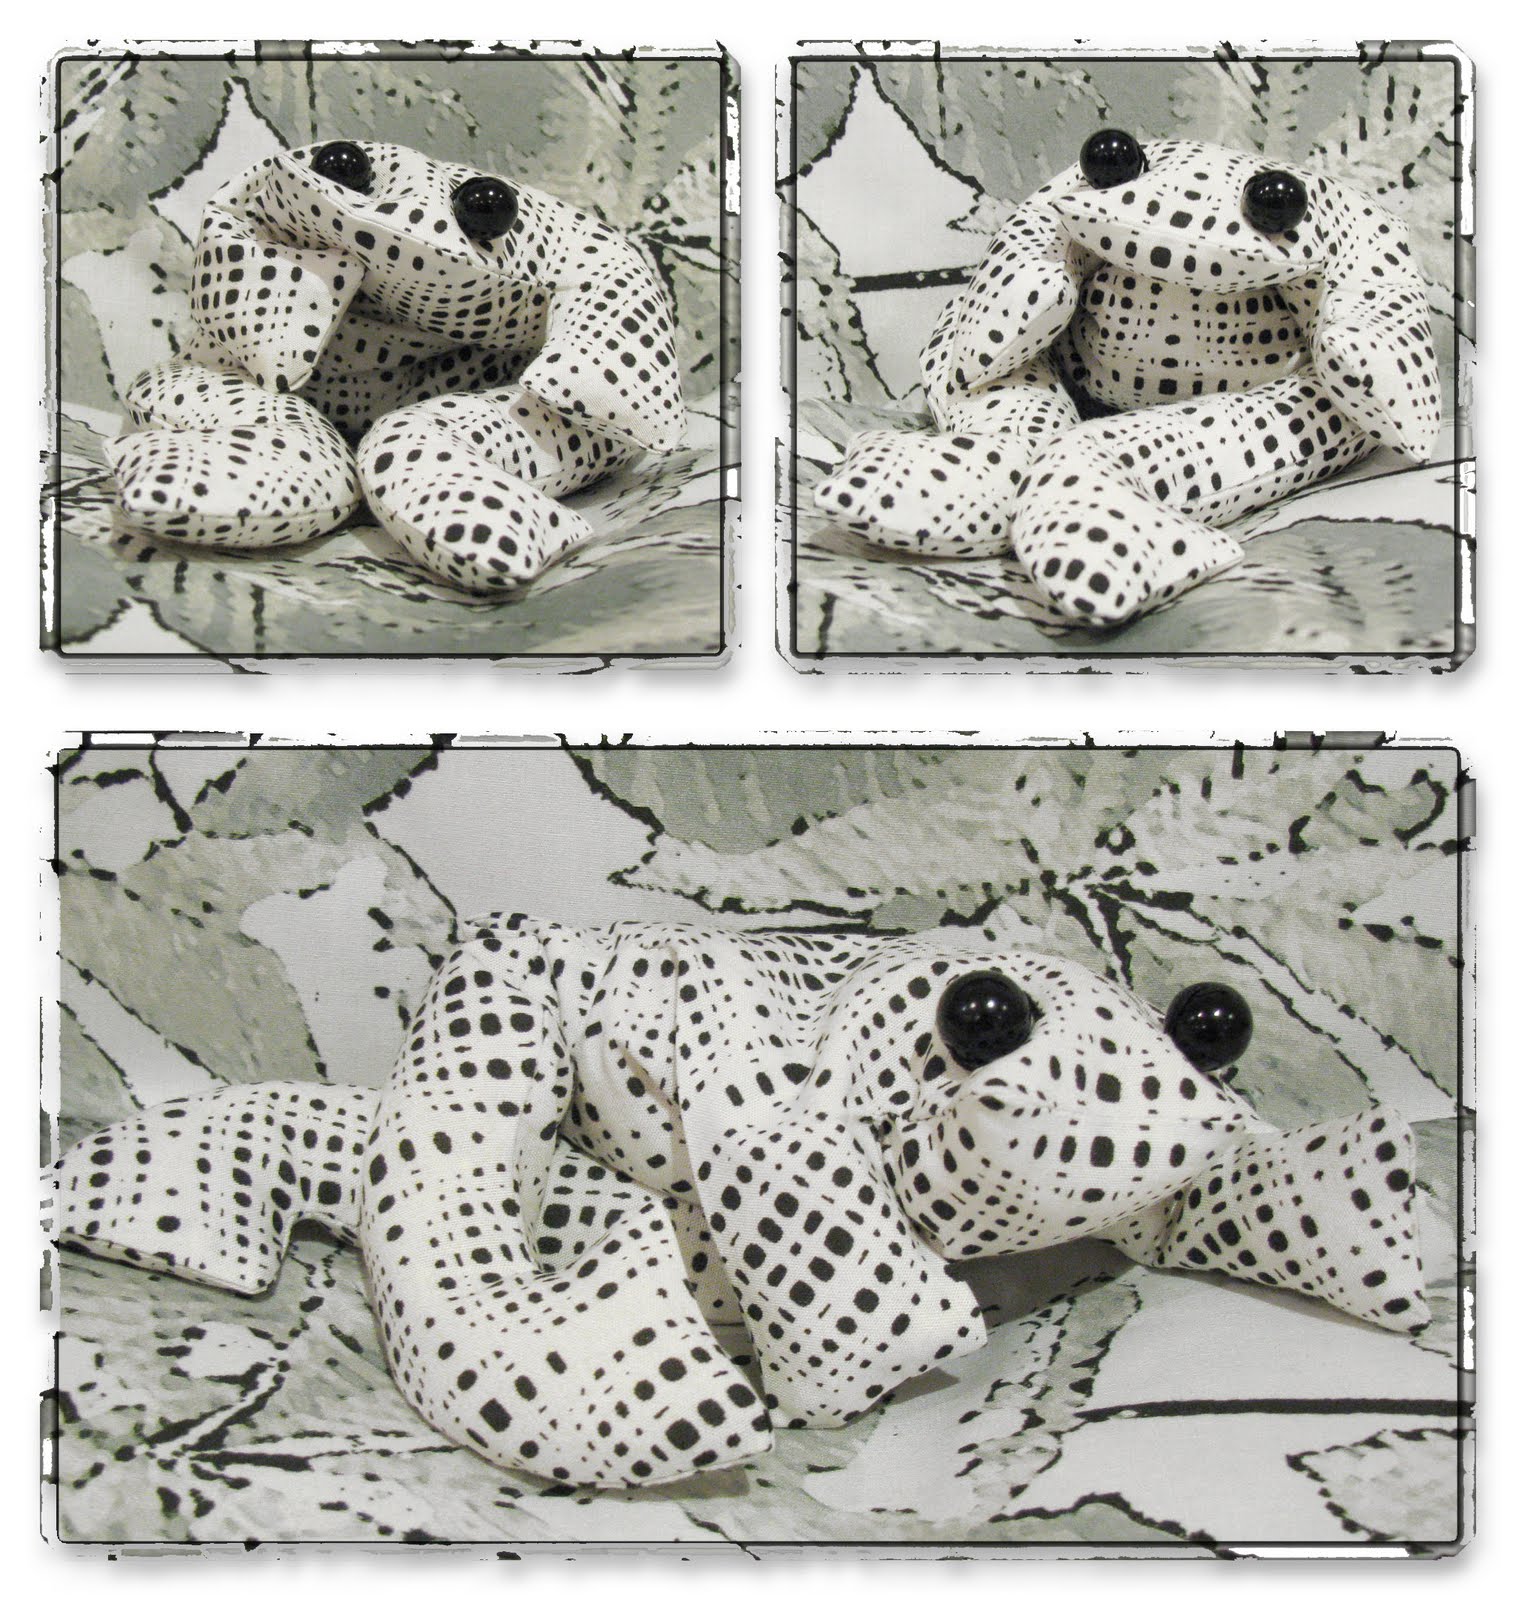
Dot - The Disco Frog


Just a quick post to show you all Dot - The Disco Frog!

A big thank-you to The Purl Bee Blog for providing this fun and easy to sew pattern :)
Dot loves to dance to the hip buzzing sounds of the lilly pond - lol -

I am really enjoying the holidays, and using the time to practice my sewing skills 
- prior to my new Quilt fabric arriving :)

Dot is made from my fabric design: Disco Dots - Night
and the background fabric is: Lofty Linen Leaves 

Happy Easter for tomorrow,
Cheers Kris :)

© All rights reserved.

Saturday, February 13, 2010

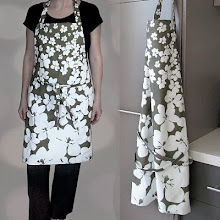
Yes You Can - Easy to Sew Reversible Apron

Reversible Apron featuring fabric designed by:
Kristopher K


Have you seen the BurdaStyle website ...?


Who is BurdaStyle you may ask? 
Well in their own words: 


"We are a friendly bunch, using the web to bring the craft of sewing to a new generation of designers, hobbyists, DIYers and anyone looking to sew."


I'm sure anyone, from a sewing pro, to a novice like me, would be able to find a variety of designs at BurdaStyle to inspire. 
From great photo's of wonderful designs to a large variety of patterns there really is something for everyone ...
Members can even upload their own creations and photos directly into the Project Showcase


Many thanks to the BurdaStyle Sewing Club from Perth, Australia for uploading BSC Perth Reversible Aprons - an adorable and "EASY AS" pattern by kaitui_kiwi (as a free to download pdf :)

Here is my version of this fun Kitchen Apron, featuring my original fabric design:

l52"x Magnolia Little Gem - Dark Spice - 1 yard panel


From start to finish this was a fun, easy and simple to follow project, that was completed in well under a day - and I'm more than happy with the result - Yeah :)


© All rights reserved.