Tuesday, December 18, 2012
Wednesday, November 21, 2012
Tutorial: Shabby Scrappy Christmas Stars!
Yay! Christmas for me, has come early, thanks to the special holiday 'Gift Wrap' print offer at Spoonflower!
I was sooo excited when my gift wrap order arrived, it was totally ridiculous!!!
.... now all I need to do, is decide if I can actually bring myself to use it!
In the meantime, here is a Tutorial for some 'Easy As' :
Shabby Scrappy Christmas Stars
~ Enjoy :)
 Gift Wrap (From Top: Vintage Christmas Stripes & Vintage Christmas) Tutorial: Shabby Scrappy Stars
 Gift Wrap (From Top: Vintage Christmas Stripes & Vintage Christmas) Tutorial: Shabby Scrappy Stars
You will need: fabric scraps, pen, cardstock, pins, cotton, needle, glass beads, stuffing, cord/ribbon.
SHABBY BEAD STAR:
~ Template : On cardstock draw a freehand star (12cm from point to point)
~ Pin template to a double layer of fabric
~ Cut out fabric stars
~ Pin fabric stars (wrong sides together)
~ Sew/bead together (5mm from edge) leaving a small gap in one side
~ Fill star with stuffing
~ Insert ends of looped cord, and continue sewing to close gap.
SCRAPPY STAR:
~ Using template above as a guide draw an addtional smaller star template (about 10cm across from point to point)
~ Pin 12cm template to a double layer of fabric and cut out fabric stars
~ Pin 10cm template to a double layer of (contrasting coloured) fabric and cut out fabric stars
~ Place 1 small star onto 1 large star (right sides up) and pin together
(creates 1 side of final star)
Sew fabrics together (very ROUGHLY 5mm from edge) and continue, till you have sewn right around the star twice
~ REPEAT the last step with the remaining large and small star!
~ Pin sewn stars (wrong sides) together
~ Sew together (5mm from edge) leaving a small gap in one side
~ Fill star with stuffing
~ Insert ends of looped cord, and continue sewing to close gap.
© Kristopher K 2012 - All rights reserved.
Monday, November 12, 2012
Mini Print Collection
All new 'Mini Print Collection'
- Four mini prints for maxi fun!
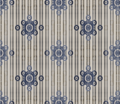
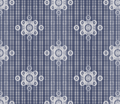
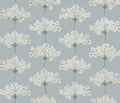
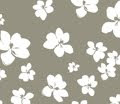
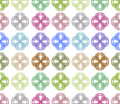
Today I decided to make some cute fabric gift tags with my new 'Mini Print' samples:(from left)
I love this time of year, as my crafting box finds its way to the centre of our dining table and I start to think about decorating the house for Christmas!
It's a good thing however, looking at my depleted fabric stash (while drooling over the new Christmas Fabrics at Spoonflower) ... that I'm just in time to take advantage of Spoonflower's upcoming Free Shipping Day on Thursday November 15th, 2012!
Oh! and if Free Shipping isn't cool enough (yes! even to Australia - whoohoo) The fabulous folk at Spoonflower are printing selected designs in the Spoonflower marketplace for a limited time on Gift Wrap!
I think Christmas has surely come early for me this year.
... Happy Crafting :)
Sunday, October 28, 2012
Fabulous!
It is always such a treat for me seeing
Kristopher K Fabrics in Action!
- thank you all so much for sending me your photos, links and updates : Below are a few fabulous creations, that I've just recently received - WOW!
...
...
Pillows: by Anson & Gonzalez

Design: Chelsea Road

Design: Fretwork Fire
...
Tote Bag by TwoBeardsPlusMomma
Design: Wild Welsh Stag 18" x 18"
Saturday, March 10, 2012
Wicket Press Fabric Collection
Below is a selection of designs from my new fabric collection: Wicket Press
Organic "hand stamped" lines repeat on linen textured backgrounds in fresh contemporary colour palettes
Wednesday, February 15, 2012
"Easy As" Recycled Mini Glass Vase
I love using old glass bottles to display flowers, fresh from the garden.
I find however, that mini glass bottles (recycled from supermarket juice bottles) used on their own can be wobbly at the best of times ... so in order to make these little glass bottles more stable, I decided to join several together, simply by wrapping them with twine!
To make these "Easy As" Mini Glass Vases:
1) Place (a minimum of two) mini glass bottles side by side
2) Wrap twine around the outside of all your mini glass bottles (If joining more than two bottles you will probably need another pair of hands to help you hold the bottles.)
3) Wrap twine tightly between each of the bottles (enough to stop the glass from touching)
4) Fill your new vase with water and flowers and enjoy :)
Wednesday, February 01, 2012
Happy New Year!
Sorry for the lateness of this post (I mean really ... can you believe it's the 1st of February already) ... but I am so excited to-day to be back in the studio, and I just wanted to shout out a great BIG ....
☆¸.•°*”˜˜”*°• Happy New Year •°*”˜˜”*°•.¸☆
and
Thank-you, to you all :)
Your wonderful support and continued encouragement has made 2011 a totally amazing year for me!
I am still over the moon, to have discovered I have once again made it onto the list of Top Indie Fabric Designers @Spoonflower (Making the grade for 2011 at number 14 - Wow :)
Wishing you all my very best for a Fabulous, Happy and Healthy, 2012!
I am still over the moon, to have discovered I have once again made it onto the list of Top Indie Fabric Designers @Spoonflower (Making the grade for 2011 at number 14 - Wow :)
Wishing you all my very best for a Fabulous, Happy and Healthy, 2012!
❤ Kris
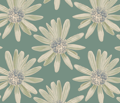
Image above (via Spoonflower's new create fabric web page) includes our designs: Lucky Four (pictured top) and Paper Daisy - Provence Blue (pictured lowest) ~ So cool to be featured ... thank-you Spoonflower :)
Subscribe to:
Comments (Atom)



































.png)


