Showing posts with label tutorial. Show all posts

Wednesday, February 15, 2012

"Easy As" Recycled Mini Glass Vase

I love using old glass bottles to display flowers, fresh from the garden.
I find however, that mini glass bottles (recycled from supermarket juice bottles) used on their own can be wobbly at the best of times ... so in order to make these little glass bottles more stable, I decided to join several together, simply by wrapping them with twine!


To make these "Easy As" Mini Glass Vases:
1) Place (a minimum of two) mini glass bottles side by side
2) Wrap twine around the outside of all your mini glass bottles (If joining more than two bottles you will probably need another pair of hands to help you hold the bottles.)
3) Wrap twine tightly between each of the bottles (enough to stop the glass from touching)
4) Fill your new vase with water and flowers and enjoy :)

Monday, December 12, 2011

"Easy As" Fabric Roses


Do you like crafting at Christmas Time? 
Christmas is usually my favourite time of year to sit around the dining table, chatting and crafting with friends and family.
I've always loved easy - yet - Oh! so pretty crafts that add a vintage or handmade feel to your decorating - I think pretty fabric roses fit this brief perfectly and best of all they can be made at any time of year!

Easy As - Fabric Rose - Tutorial!
- Tear a strip of fabric / old scraps of cotton and/or linen fabrics are perfect for these pretty roses
(Note: changing the width and length of your fabric strips will create interesting variations in your roses
- Fray the edges of your fabric strip
- Tie a knot in one end of your fabric strip
- Wrap the remaining fabric strip around the knot (twisting as you go) 
- As you twist the fabric use a needle and thread to stitch (hold) fabric in place (or hold fabric in place with glue from a hot glue gun etc)
- When you have almost finished wrapping your rose, tuck the end of your fabric strip to the underside of your new rose
- Your new fabric rose can then be sewn onto ribbon to decorate presents etc

-Enjoy :)

Thursday, December 01, 2011

Fabric Gift Tag Tutorial


It's the 1st December! - can you believe it?


For us the 1st December has always been the day when our old dusty box of Christmas Crafty Goodness gets pulled down from the back of the cupboard, and our home is decorated for Christmas (although I'm always so tempted to start earlier)

So today as well as decorating the tree, I've made some personalised Gift Tags (with a lovely handmade shabby feel) for the numerous "brown paper packages" soon to be placed under the tree!

Below is a little DIY tutorial, for my Fabric Gift Tags  ... Happy Decorating :)

Fabric Gift Tag Tutorial

Materials

1 x 3.5" x .5" cardstock rectangle (per gift card)
1 x 7" x 1" linen or burlap fabric rectangle (per gift tag)
Sewing Machine and thread (to match fabric)
Scissors
Hole punch and eyelet kit (or a button and thread)
Stamps, Stencil Kit or Fabric Paint to decorate


Method

- Cut cardstock rectangle to size
- Cut fabric rectangle to size and fray edges
- Wrap cardstock rectangle with the fabric rectangle to create fabric gift card
- Sew around all edges of gift tag (to the inside of the frayed edge)
- Using a hole punch make a hole in your gift tag about .5" in from one end of your gift tag (Or attach a button at one end of your tag)
- Trim any extra fabric /cardstock created by hole punch, to ensure a flat surface for eyelet
- Using hardware supplied with your hole punching kit attach eyelet
- Stamp, stencil, or paint your gift tag with a message or your recipients name etc
- Attach ribbon or twine (through the eyelet or around the button) and attach gift tag to your gift
- Voila :)
Saturday, November 05, 2011

"No Sew" Christmas Ornament Tutorial

... seeing all the Christmas Decorations starting to appear in the stores earlier this week, I decided today to make some new fabric ornaments for the tree! ...
(I know ... I know ... where has the year gone?)


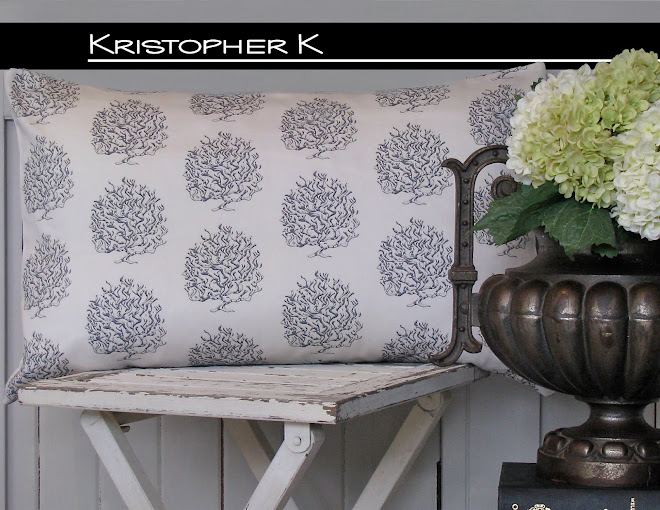
So using fabric swatches of my design "Linen Look Stars" in Cinnamon and Mint (as above) I made these - So Simple! - So easy! - No Sew Ornaments :)
Below is a little Tutorial, incase your wanting to make some too :)

"No Sew" Christmas Ornament Tutorial

Materials:
1 x 65mm Polystyrene Ball (per ornament)

1 x 8" square of fabric (per ornament)
Pins
Twine

Instructions:
- Tear 8 even strips of fabric
- Place 2 strips of fabric together at right angles
- Continue to add strips of fabric (as shown)
- Place Polystyrene Ball in the center of the fabric strips
- Wrap the fabric strips around the polystyrene ball
- Fasten fabric in place, with a pin (and add a loop of twine under pin if hanging ornament)
- Enjoy :)

Sunday, April 03, 2011

Pear Harvest - Cabinet Makeover!

Yay!
Today I finished making over my new 'stock' cabinet!!!

Finding this beauty for a bargain price on ebay was the easy part 
- deciding what fabric to use for the makeover, .... well that's another story!

Weeks of procrastinating later, I finally ordered my Spoonflower design "Pear Harvest
I love that even with the doors closed, you get the sense you are peeking inside the cabinet, to see shelves of pretty pears all lined up in rows :)

Before pics below:


To give this cabinet a simpler, more rustic country feel - the first thing I did was remove the fancy 'fret work' from the legs.
Then I lightly sanded, washed and painted the cabinet in one of my all time favourite products: White Paint!


Further adding to the country feel, I attached a new iron handle and French inspired escutcheon (for a key and tassel.)


To attach the fabric to the timber panels, I measured and cut the fabric to size - and simply used double sided tape to fix the fabric to the timber .
(This also makes the fabric quite easy to remove whenever it's time for a change)
Finally the edges of the fabric were topped with ribbon (applied with a hot glue gun.)


And Voila!